Seofon
Two swordmasters for the price of one
- Element
- Wind
- Weapon
- Sabre
- Role
- DPS
- Range
- Melee
- Release
- Free update
- Difficulty
- 4 out of 5

Signature mechanic
Avatar doubles his attack output
Seofon spends the Avatar gauge, filled by combo finishers, to summon a duplicate that attacks alongside him. While the avatar is active, further finishers raise his Swordshine level, which adds extra attacks on top. The rule that defines him is simple: only use skills while the avatar is out, because everything is worth roughly double there.
Seofon is a combo-heavy DPS that revolves around summoning his avatar to double his attack output. He has skills that give massive buffs, further improving his power, and is good to use against bosses. One of the best skills he has in his arsenal is the Seven-Star's Brilliance, which maxes out all SBA gauges, letting his team deal chained SBA frequently.— Game8 tier assessment
Strengths
- 1
Enormous burst windows
Avatar plus high Swordshine effectively doubles his output for the duration.
- 2
Excellent against bosses
S tier, with self-buffs that make him one of the strongest single-target duellists.
- 3
Clear decision rules
Complex to execute but conceptually simple — hold skills for the avatar window.
Weaknesses
- 1
Feast or famine
Outside the avatar window his damage is ordinary, so poor gauge management wastes the character.
- 2
Finisher-gated
Everything keys off combo finishers; interruptions cost you both gauge and Swordshine.
- 3
Paid unlock
Requires Siero's Treasure Trade or a purchase rather than normal progression.
Support skills (passives)
Star Sword Sovereign
Allows Seofon to consume the Avatar gauge to summon an avatar. Landing combo finishers fills the Avatar gauge.
Spirit Swords
Seofon deals additional attacks based on his Swordshine level. Landing combo finishers while an avatar is summoned raises Swordshine level.
How to unlock
Trade Via Siero's Treasure TradeSeofon can be unlocked by trading 3 Supreme Weapon Essence for his Crewmate Card. This can be done via the Treasure Trade in Siero's Knickknack Shack .
Gear
Builds by progression stage
Zegagrande Legend — Maniac quests, first Proud attempts
Not an early-game character — he unlocks via treasure trade well after the main story.
Sigil priorities — Maniac
Damage cap is the only stat that scales here. Chase any DMG Cap trait you can roll, then critical hit rate, then raw attack.
- DMG Cap — on every sigil you can manage
- Critical Hit Rate — consistency beats spikes
- Stamina / Tyranny — cheap attack scaling
- Seofon's character sigil (single-trait version)
- Potion Hoarder — more healing per run
- Autorevive — a free second chance
- Improved Dodge — as a secondary trait, not a slot
- War Elemental — the moment a Curio gives you one
Skills to run: Barrido, Tempesta, Infinito Creare, Despedazar — the same core carries all the way to endgame.
Gearing priorities
- Ascension or Stinger weapons, fully upgraded before you chase anything rarer
- Unlock every sigil slot via the Mastery tree, then Fate Episodes for the last two
- Any DMG Cap trait you can find — attack stats alone stop mattering fast
- Critical Hit Rate, Stamina and Tyranny to pad raw output
- Potion Hoarder and Autorevive so runs do not end early
Weapons to use
No Terminus yet. Fully upgrade whichever of Seofon's standard weapons you can forge — the Collection Mastery passives from levelling every weapon matter more right now than which one you hold.
- Sette di Spade — Greater Aegis, Stronghold, Quick Cooldown
- Gateway-Star Sword — ATK, Supplementary DMG
- Sword of Eternal Splendor — Catastrophe, Regen
- Spada di Vento — Critical Hit Rate, Critical DMG
Proud quests, Bahamut's Rage, Lucilius (Quest Zero)
Sword of Eternal Splendor. Discipline yourself early: never spend a skill outside an avatar window.
Sigil loadout — Proud endgame
Seofon's best sigils revolve around improving the damage of his normal attacks and skills . You can raise the damage cap of both attacks primarily with Alpha and Beta . Tyranny and Stamina are his main source of attack stats, allowing him to reach the damage cap provided by Gamma and DMG Cap .
Supplemental Damage and Berserker's Echo are essential to his build as they help him deal additional instances of damage, which also includes the attacks from his avatar. For Seofon's character-specific sigils , it is best to get Awakening , and Warpath . You can also use the Rally and Fury versions if the sub-traits are good.
As for his utilities and defensive options, choosing Cascade is important to lower the cooldown of his abilities after every hit. This will help him use his skills often in battle, and it will help him gain avatar and swordshine gauge faster. Potion Hoarder and Autorevive to give himself another chance to fight again if you mess up your combo and fail to dodge an attack.
| Sigil | Traits |
|---|---|
| Alpha+ |
|
| Beta+ |
|
| Gamma+ |
|
| Gamma+ |
|
| Spirit Edge's Awakening+ |
|
| Tyranny V+ |
|
| Spirit Edge's Warpath+ |
|
| War Elemental+ |
|
| Berserker Echo+ |
|
| Supplementary Damage V+ |
|
| Critical Hit Rate V+ |
|
| Potion Hoarder V+ |
|
Gearing priorities
- Terminus weapon, fully upgraded and awakened — Catastrophe wants max HP at or below 45,000
- Alpha+, Beta+ and Gamma+ from Lucilius drops for stacked damage cap
- Character Awakening+ and Warpath+ sigils via Transmute and Transmarvel
- War Elemental+ so every hit counts as superior element
- Supplementary Damage V+ and Berserker Echo+ to punch through the cap
- Over Mastery Lvl 3: Critical Hit Rate Up plus the Damage Cap Ups
Over Mastery bonuses
- Skill Damage Cap Up
- Stun Power Up
- Normal Attack Damage Cap Up
- Skybound Art Damage Cap Up
Once Seofon has all of his Weapon Transcendance Masteries fully unlocked, he will have 80%-82% Critical Hit Rate without any sigils, traits, or summons. Therefore, he only needs to enable one Master Trait that increases his Critical Hit Rate by 20% to reach 100%, which will give him more room for his Over Mastery Bonus.
Best-in-slot — Terminus
Sword of Eternal Splendor
- Catastrophe
- RegenAutomatically recover health over time.
Max HP 2285
Max ATK 99
Crit Rate 0%
Stun Power 0
Wrightstone
Dread Wrightstone
- Stun Power
- Combo Booster
- Cascade
Sword of Eternal Splendor is Seofon's Terminus Weapon and is his best weapon in the endgame. It has an incredibly high raw attack stat in exchange for lower maximum HP . It works well with Catastrophe , which further boosts Seofon's attack by 50% and Damage Cap by 100% when max HP is at or below 45,000 HP. He also gains Regen to gradually restore health in battle, and Sigil Booster to increase all his trait levels by 1 once fully awakened.
Chaos → Chaos+ → Chaos++, then Defy Infinity
Fueling the Avatar, built around the Combo B loop. Dodge between Combo B reps rather than dropping the chain.
Sigil loadout — Fatebreaker
Seofon's sigils in Endless Ragnarok center around his Master Traits. To get the maximum value out of it, he specifically needs 5 Basic-Stat , 3 Attack , and 2 Defense or Support . This will provide him up to 200% Damage Cap , 100% Attack Boost , 6% Defense , and 20,000 base HP .
We recommend 2 Health and 3 Stun Power for his basic stat sigils. Equipping exactly one Greater Aegis and Aegis boosts his health to 180k–195k without disabling the Catastrophe Nova boost. For attack, always run Fatebreaker , Celestial Lumen , and Celestial Terra to raise his damage cap. Finally, use his defense/support slots for Improved Dodge (for better evades) and Steel Nerves (for damage reduction with Stout Heart).
Prioritize Supplementary DMG and DMG Cap subtraits to boost his damage, and fully utilize his Fury and Rally character-sigils in the endgame. Due to the existence of summon traits, Warpath is removed in this build. Run Uplift to build his SBA gauge faster, and slot in Guts , Potion Hoarder , and Autorevive for his survivability options. Quick Cooldown further reduces the cooldown of his skills.
| Sigil | Slot | Traits |
|---|---|---|
| Spirit Edge's Awakening+ | Character sigil1 slot |
|
| Health V+ | Basic stat5 slots |
|
| Health V+ |
| |
| Stun Power V+ |
| |
| Stun Power V+ |
| |
| Stun Power V+ |
| |
| Fatebreaker V+ | Attack / special3 slots |
|
| Celestial Lumen V+ |
| |
| Celestial Terra V+ |
| |
| Quick Cooldown V+ | Defense / support3 slots |
|
| Improved Dodge+ |
| |
| Steel Nerves V+ |
|
Gearing priorities
- Transcended Terminus (T.Lvl 7): Catastrophe Nova, DMG Cap, Sigil Booster, Unbound Master
- While progressing Chaos, a transcended Defender weapon usually beats an un-transcended Terminus
- The standard template: 5 Basic-Stat + 3 Attack + 2 Defense/Support sigils
- Fatebreaker V+, Celestial Lumen V+ and Celestial Terra V+ in the attack slots
- Improved Dodge+ and Steel Nerves V+ for survivability that does not cost damage
- Summons for their traits: War Elemental, Stout Heart, Berserker Echo, Spartan Echo
Over Mastery bonuses
- Skill Damage Cap Up
- Stun Power Up
- Normal Attack Damage Cap Up
- Skybound Art Damage Cap Up
Once Seofon has all of his Weapon Transcendance Masteries fully unlocked, he will have 80%-82% Critical Hit Rate without any sigils, traits, or summons. Therefore, he only needs to enable one Master Trait that increases his Critical Hit Rate by 20% to reach 100%, which will give him more room for his Over Mastery Bonus.
Best-in-slot — transcended Terminus
Sword of Eternal Splendor
- I
- Catastrophe NovaLv 35Boosts attack power and damage cap when maximum health is below a certain threshold.
- II
- DrainLv 25Recover health based on the damage dealt to a foe.
- III
- DMG CapLv 15Raises the damage limit of attacks.
- IV
- Sigil BoosterLv 1Raises the trail levels of all equipped sigils.
- EX
- Unbound MasterLv 55Boosts damage cap based on master level.
Wrightstone
Sequestration Wrightstone
- Weak Point DMG
- Supplementary DMG
- Cascade
Seofon's optimal endgame weapon is his Transcended Terminus Weapon, Sword of Eternal Splendor . It upgrades Catastrophe to Catastrophe Nova, which grants up to a 70% attack boost and 500% damage cap if his max HP is 200,000 or less . The weapon also features an innate DMG Cap to free up a sigil slot, Unbound Master to raise the damage cap further via Master Trait level, and Sigil Booster to increase all sigil levels by 1.
While progressing Chaos
Sette di Spade
- I
- HPLv 35Boosts base health.
- II
- Greater AegisLv 25Greatly raises maximum health in proportion to your current maximum health.
- III
- DMG Cap EcruLv 15Boosts attack power and damage cap based on how high your maximum health is.
- IV
- StrongholdLv 10Boosts defense the higher your remaining health is.
- EX
- Unbound ExertionLv 15Boosts damage cap of Skybound Arts.
Wrightstone
Sequestration Wrightstone
- Weak Point DMG
- DMG Cap
- Supplementary DMG
He additionally gains DMG Cap Ecru , which gives him more damage cap based on his maximum health. Once the weapon reaches max transcendance, it permanently gains Unbound Exertion , which gives Seofon increased Skybound Art damage cap.
Summons & equip bonus
Recommended summons
- Lucilius
- Beelzebub
- Rolan
- Vrazarek Firewyrm III
For these traits
- War Elemental
- Stout Heart
- Berserker Echo
- Spartan Echo
Equip bonus
- Normal Attack Damage Cap Up
- Skill Damage Cap Up
- Skybound Art Damage Cap Up
- Stun Power Up
Level 100+ · Endless Ragnarok
Master Traits
Fueling the Avatar
RecommendedRank 1
- Unique Attack Combo Finishers: ATK +10%
- Avatar Gauge Gain +5%
- DMG Cap +15%
- Max HP +15000
Rank 2
- Upon landing a combo finisher: Avatar Gauge Gain +10%
- Insight Rank Perk 2: Landing damage skills boosts Avatar Gauge Gain by an additional 10%
- While an avatar is summoned: ATK +10%
- Barrido: ATK +10%
- DMG Cap +20%
- ATK +20%
Rank 3
- Unique Attack Combo Finishers: DMG Cap +35%
- Upon summoning an avatar: Swordshine now starts from at least lvl 1
- Normal Attacks: DMG Cap +35%
- Tempesta: Cooldown -5%
- DMG Cap +20% per Basic Stats-type sigil equipped (max sigils: 5)
- Max HP +15000
Rank EX
- While an avatar is summoned: DMG Cap +40%
- Barrido: DMG Cap +45%
- Tempesta: ATK↑ grants an additional ATK +5%
- Upon performing a perfect dodge: Grants Shield (1000)
- DMG Cap +20% per Basic Stats-type sigil equipped (max sigils: 5)
- Critical Hit Rate +25%
- DMG Cap +35%
- DMG Cap +35%
Sword Tempest
Rank 1
- Skill ATK +10%
- All skills except Seven-Star's Brilliance: Cooldown -2%
- DMG Cap +15%
Rank 2
- Ckill DMG Cap +35%
- Infinito Creare: DMG Cap +45%, Cooldown +10%
- ATK +20%
Rank 3
- Unique Attacks: DMG Cap +35%
- DMG Cap +25%
Rank EX
- Infinito Creare: DMG Cap +45%
- Despedazar: DMG Cap +45%
- ATK +10% per Attack-type sigil equipped (max sigils: 5)
- DMG Cap +35%
- DMG Cap +35%
Tag Team
Rank 1
- When Swordshine reaches level 1 or above: Seofon gains Supplementary DMG. DMG is based on Swordshine level
- DMG Cap +15%
- Max HP +15000
Rank 2
- Unique Attacks: DMG Cap +35%
Rank 3
- DMG Cap +25%
- HP +10,000 per Defense- or Support-type sigil equipped (max sigils: 4)
Rank EX
- Avatar Finishers: DMG Dealt +5%
- While in critical condition: Critical Gauge Depletion -10%
- DEF +6% per Defense- or Support-type sigil equipped (max sigils: 5)
- Stun Power +4
- DMG Cap +35%
- Primal bursts gain DMG Dealt +25%. Effect strength is based on the total number of this effect equipped by the entire party
- DMG Cap +35%
This distribution considers Master Level 50.
Seofon's best Master Trait is Insight: Fueling the Avatar to increase the duration and damage of his Avatar. This perk allows him to gain Avatar gauge with his skills . It also increases his damage dealt and Swordshine level when summoning an Avatar.
As for his Traits, prioritize getting Damage Cap for his skills and unique attacks. You can also get increased Avatar Gauge gain after a combo finisher . Make sure to equip one Critical Hit Rate +25% . It is also important to activate all traits that provide bonuses based on equipped sigils . Lastly, enhance his Fueling the Avatar perks with traits that starts him at a higher Swordshine level when summoning an avatar.
Execution
Combos & rotation
Combo B Fueling the Avatar Combo (Endless Ragnarok)9 steps
- 1Immediately summon his Avatar at the start of battle, even if he has no Avatar gauge
- 2Cast Barrido to close the gap and gain Avatar Gauge
- 3Use Infinito Creare and Despedazar to gain more Avatar Gauge
- 4(Optional) If link attack is available, use it to gain significantly more Avatar Gauge and Swordshine level
- 5Execute a few Combo B until you have Swordshine level 3
- 6Use Tempesta to regain all your Avatar Gauge while giving Seofon a higher attack and critical hit rate up buff.
- 7Repeat Combo B while using the skills once it is available right away
- 8If all skills are on cooldown and Seofon is about to run out of Avatar Gauge, use Combo E to dismiss his Avatar with a finisher
- 9Immediately summon his Avatar again after one of his skills is available, then repeat the entire combo with a Swordshine level 1 right off the bat on his next summon.
You can use Seofon's upgraded combo once he is at Master Trait level 30. The main difference is that his damage is significantly higher and his Avatar lasts longer in a fight as long as you can do combo finishers and skills constantly. If you executed the combo well while avoiding any damage, he should be able to resummon his Avatar at full gauge as soon as it expires.
His Combo E move can be seen in Seofon's command list. You can do the move by using four normal attacks, followed by two unique attacks, and ending with a combo finisher to execute an avatar finisher when an avatar is summoned.
Combo B Tempesta Combo (Pre-DLC)5 steps
- 1Always start the fight with Tempesta to instantly gain max Avatar gauge
- 2Use Barrido to close the gap and damage the enemy
- 3Cast Despedazar and Infinito Creare to deal more damage
- 4Do Combo B until any one of Seofon's skills goes off cooldown, then immediately use it
- 5Repeat until you run out of Avatar gauge
Seofon's best combo revolves around gaining Swordshine level as fast as possible using his skills and Combo B repeatedly. After you use 3 of his skills, you should be at level 2 Swordshine. A few Combo B will put you at level 3, which will enhance all of Seofon's attacks and skills going forward.
His Combo B move can be seen in Seofon's command list. You can do the move by using two normal attacks, followed by two unique attacks, and ending with a combo finisher.
Only Use Skills When Avatar Is Active
Once Seofon runs out of Avatar gauge, do not use his skills without it. Focus on gaining Avatar gauge by using Tempesta or executing any combo finishers. More than half of his Avatar gauge is enough . Recall his avatar by pressing his unique attack, then resume his combo.
Swordshine Level Enhances Seofon's Attacks
Each Swordshine level enhances all of Seofon's attacks. He hits more and deals increased damage than his non-Avatar attacks.
Dodge In Between Combo B When Necessary
You can dodge in between his attacks to avoid taking damage while preserving his combo finishers . Use this to your advantage to reposition yourself during battle, especially against agile bosses.
Use Link Attacks to Gain Avatar and Swordshine
When Avatar is activated, the only way for Seofon to regain his Avatar gauge is to use a link attack. This is why Stun Power is important for him so that he can do link attacks often.
Kit
Skills
Recommended loadout — Barrido and Tempesta
Seofon utilizes both his normal attack combos and skills. It is best for him to have 3-4 offensive skills to take full advantage of his Avatar, which can enhance his skills. His Avatar gauge gain is slow, so make sure to use Tempesta to instantly grant him maximum Avatar gauge.
As for his offensive skills, Barrido is his gap closer that can deal a lot of damage and has a low cooldown. Despedazar launches small enemies it hits as well as deals multiple small AoE damage in front of him. Infinito Creare is his projectile skill that deals a high amount of small damage in an area. Use this skill only when the enemy cannot dodge it.
| Skill | Effect | Applies |
|---|---|---|
| BarridoRecommended | A fast lunge attack. When Swordshine lvl is high enough, avatar joins the attack for more hits. | |
| DespedazarRecommended | Unleashes a series of swift slashes. When Swordshine lvl is high enough, avatar joins the attack for more hits. | |
| Infinito CreareRecommended | Barrages a foe with spirit swords. When Swordshine lvl is high enough, unleashes more spirit swords. | |
| Ispirazione | Grants Hostility↑ and DEF↑ to Seofon. Also grants Debuff Immunity when Swordshine lvl is high enough. | |
| Prisión de Armas | Unleashes a conical wave of damage that inflicts Slow to foes. When Swordshine lvl is high enough, avatar joins the attack for more damage. | |
| Rotura | Dodges backward, then leaps forward to deal a high amount of stun. When Swordshine lvl is high enough, avatar joins the attack for more hits. | |
| Seven-Star's Brilliance | Maxes out all SBA gauges. Castable once per battle. Starts on a cooldown (effects can't shorten it). Entering critical condition restarts the cooldown. | |
| TempestaRecommended | Grants Critical Hit Rate↑ and ATK↑ to Seofon, and maxes out the Avatar gauge. Effect strength is boosted when Swordshine lvl is high enough. |
Situational swaps: Seven-Star's Brilliance.If you have fully mastered Seofon and all of the boss patterns. You can swap out any of his skills with Seven-Star's Brilliance . It has a significantly long starting cooldown at the start of battle, a slow charge when activated, and a single-time use per battle. It can also reset the cooldown if Seofon is downed in battle.
Gear
Weapons
Every weapon Seofon can hold, and what each one costs to take all the way. The two with the gold ring are the ones worth the materials: Terminus and Ascension are the only series that Awaken at Lv. 150, and Awakening is the gate on Transcendence. Open any weapon for its stats, traits and full material list.
Sword of Eternal SplendorThe Endless Ragnarok build runs thisTerminusHP 2,285·ATK 99
The endgame goal. A rare drop from The Tale of Bahamut's Rage on Proud, or forged with Ultimate Memory once Endless Ragnarok is underway.
- Max level
- 150
- Max HP
- 2,285
- Max ATK
- 99
- Crit Rate
- 0%
- Stun Power
- 0
Traits
- Regen
- Automatically recover health over time.
- Catastrophe
Unlocked by transcending
- Catastrophe NovaTranscendence Lv. 1
- Boosts attack power and damage cap when maximum health is below a certain threshold.
- Unbound MasterTranscendence Lv. 7
- Boosts damage cap based on master level.
Everything it costs
23 upgrade steps in total, and 1,356,000 rupies. Quantities below are the full run, not per step.
- Legendary Merit×405
- Fortitude Crystal【L】×230
- Exceptional Refinium×144
- Ragnite (Terminus)×105
- Silver Centrum×45
- Reality Thorn×34
- Mana Circuit×24
- Managarmr Nihilla Core×16
- Terror Urn×13
- Protocol Fiber×12
- Divinity Shackle×8
- Furycane Nihilla Core×8
- Heliotrope Urn×8
- Nihilla Horn of Disdain×8
- Horn of Bahamut×7
- Blaze of the Wedges×6
- Chaotic Signum×6
- Forgotten Azureplume×6
- Chronos Core×5
- Nihilla-Cast Sword×4
- Lunary Cell×3
- Lunary Detector×3
- Primeval Firestorm Node×2
- Primeval Galewing Node×2
- Demigod Feather×1
- Hexachrome Quartz×1
- Provenance Crystal×1
Level upgrades
Six tiers at the Blacksmith, Lv. 10 to 150.
Tier 1Lv. 10 → 30
- Legendary Merit×20
- Exceptional Refinium×3
- Reality Thorn×1
- Rupies×1,000
Tier 2Lv. 30 → 50
- Legendary Merit×20
- Exceptional Refinium×5
- Reality Thorn×2
- Rupies×2,000
Tier 3Lv. 50 → 75
- Legendary Merit×20
- Exceptional Refinium×7
- Reality Thorn×3
- Terror Urn×1
- Rupies×7,000
Tier 4Lv. 75 → 100
- Legendary Merit×20
- Exceptional Refinium×20
- Reality Thorn×3
- Terror Urn×1
- Rupies×15,000
Tier 5Lv. 100 → 125
- Legendary Merit×20
- Exceptional Refinium×12
- Silver Centrum×1
- Reality Thorn×7
- Terror Urn×3
- Horn of Bahamut×1
- Heliotrope Urn×3
- Rupies×36,000
Tier 6Lv. 125 → 150
- Legendary Merit×20
- Exceptional Refinium×15
- Silver Centrum×3
- Reality Thorn×10
- Terror Urn×5
- Horn of Bahamut×3
- Heliotrope Urn×5
- Demigod Feather×1
- Rupies×70,000
Awakening
Unlocked once the weapon hits Lv. 150. Done at Siero's Knickknack Shack, not the Blacksmith.
Awakening Lv. 1
- Exceptional Refinium×7
- Protocol Fiber×1
- Reality Thorn×3
- Terror Urn×1
- Silver Centrum×1
- Legendary Merit×15
- Rupies×100,000
Awakening Lv. 2
- Protocol Fiber×2
- Reality Thorn×5
- Terror Urn×2
- Silver Centrum×1
- Legendary Merit×15
- Rupies×105,000
- Exceptional Refinium×7
Awakening Lv. 3
- Exceptional Refinium×8
- Protocol Fiber×3
- Mana Circuit×1
- Furycane Nihilla Core×3
- Nihilla-Cast Sword×1
- Silver Centrum×3
- Legendary Merit×15
- Rupies×110,000
Awakening Lv. 4
- Exceptional Refinium×8
- Protocol Fiber×3
- Mana Circuit×1
- Managarmr Nihilla Core×3
- Nihilla Horn of Disdain×1
- Silver Centrum×3
- Legendary Merit×20
- Rupies×115,000
Awakening Lv. 5
- Exceptional Refinium×8
- Protocol Fiber×3
- Mana Circuit×1
- Managarmr Nihilla Core×3
- Nihilla Horn of Disdain×1
- Silver Centrum×3
- Legendary Merit×30
- Rupies×120,000
Awakening Lv. 6
- Exceptional Refinium×8
- Mana Circuit×3
- Lunary Detector×1
- Divinity Shackle×1
- Furycane Nihilla Core×5
- Nihilla-Cast Sword×3
- Silver Centrum×5
- Legendary Merit×30
- Rupies×125,000
Awakening Lv. 7
- Exceptional Refinium×8
- Mana Circuit×3
- Lunary Detector×1
- Divinity Shackle×1
- Managarmr Nihilla Core×5
- Nihilla Horn of Disdain×3
- Silver Centrum×5
- Legendary Merit×30
- Rupies×130,000
Awakening Lv. 8
- Exceptional Refinium×8
- Mana Circuit×3
- Lunary Detector×1
- Divinity Shackle×1
- Managarmr Nihilla Core×5
- Nihilla Horn of Disdain×3
- Silver Centrum×5
- Legendary Merit×30
- Rupies×130,000
Awakening Lv. 9
- Exceptional Refinium×10
- Mana Circuit×5
- Chronos Core×2
- Lunary Cell×1
- Divinity Shackle×2
- Horn of Bahamut×1
- Silver Centrum×5
- Legendary Merit×50
- Rupies×140,000
Awakening Lv. 10
- Exceptional Refinium×10
- Mana Circuit×7
- Chronos Core×3
- Lunary Cell×2
- Divinity Shackle×3
- Horn of Bahamut×2
- Silver Centrum×10
- Legendary Merit×50
- Rupies×150,000
Transcendence
Endless Ragnarok only, and Awakening has to come first. Tier 1 and Tier 7 are the two that add a trait.
Tier 1
- Ragnite (Terminus)×5
- Provenance Crystal×1
Tier 2
- Ragnite (Terminus)×10
- Forgotten Azureplume×3
- Fortitude Crystal【L】×10
Tier 3
- Ragnite (Terminus)×20
- Forgotten Azureplume×3
- Fortitude Crystal【L】×10
Tier 4
- Ragnite (Terminus)×20
- Chaotic Signum×3
- Fortitude Crystal【L】×30
Tier 5
- Ragnite (Terminus)×20
- Chaotic Signum×3
- Blaze of the Wedges×1
- Fortitude Crystal【L】×30
Tier 6
- Ragnite (Terminus)×30
- Primeval Firestorm Node×2
- Blaze of the Wedges×5
- Fortitude Crystal【L】×50
- Primeval Galewing Node×2
Tier 7
- Hexachrome Quartz×1
- Fortitude Crystal【L】×100
Materials and stats from Game8's Sword of Eternal Splendor page.
Gateway-Star SwordAscensionHP 3,058·ATK 4,013
The progression weapon. Forged at the Blacksmith, and the one series besides Terminus that can be Awakened — which is what carries a build through Maniac and into Proud.
- Max level
- 150
- Max HP
- 3,058
- Max ATK
- 4,013
- Crit Rate
- 0%
- Stun Power
- 0
Traits
- ATK
- Boosts attack power.
- Supplementary DMG
- Grants a certain chance for normal attacks and damage skills to deal supplementary damage.
Unlocked by transcending
- SupernovaTranscendence Lv. 1
- Boosts attack power and damage cap.
- Unbound StrikeTranscendence Lv. 7
- Boosts damage cap of normal attacks.
Everything it costs
16 upgrade steps in total, and 1,281,000 rupies. Quantities below are the full run, not per step.
- Legendary Merit×105
- Exceptional Refinium×55
- Silver Centrum×24
- Wind Orb×8
- Griffin Talon×7
- Giant Beak×5
- Furycane Anima×4
- Furycane Omega Anima×4
- Griffin Feather×4
- Broken Savage Sword×3
- Calamity Corskscrew×3
- Champion Merit×3
- Chilling Demon Eye×3
- Crowning Parapet×3
- Ether Battery×3
- Flamebeast Horn×3
- Frostbeast Horn×3
- Frosty War Axe×3
- Green Dragon Scale×3
- Heliotrope Urn×3
- Landbeast Horn×3
- Quality Refinium×3
- Searing War Axe×3
- Supreme Merit×3
- Windwyrm's Jewel×3
- Angra Mainyu Omega Anima×2
- Calamitous Hand×2
- Excavallion Omega Anima×2
- Gallanza Anamnesis×2
- Id Anamnesis×2
- Maglielle Anamnesis×2
- Managarmr Omega Anima×2
- Standard Refinium×2
- Vitality Hoof×2
- Vulkan Bolla Omega Anima×2
- Cutthroat Flag×1
- Demigod Feather×1
- Destrudo×1
- Dragon Scale×1
- Dreaded Tail×1
- Fortified Hearth×1
- Sequestered Mane×1
- Silver Wolf Clovis×1
Level upgrades
Six tiers at the Blacksmith, Lv. 10 to 150.
Tier 1Lv. 10 → 30
- Standard Refinium×1
- Rupies×1,000
Tier 2Lv. 30 → 50
- Standard Refinium×1
- Griffin Feather×1
- Rupies×7,000
Tier 3Lv. 50 → 75
- Quality Refinium×1
- Griffin Talon×1
- Rupies×7,000
Tier 4Lv. 75 → 100
- Champion Merit×3
- Quality Refinium×2
- Wind Orb×3
- Griffin Feather×3
- Griffin Talon×3
- Dragon Scale×1
- Rupies×15,000
Tier 5Lv. 100 → 125
- Supreme Merit×3
- Exceptional Refinium×2
- Wind Orb×5
- Griffin Talon×3
- Furycane Anima×1
- Green Dragon Scale×3
- Rupies×36,000
Tier 6Lv. 125 → 150
- Legendary Merit×5
- Exceptional Refinium×3
- Giant Beak×2
- Silver Centrum×1
- Furycane Anima×3
- Furycane Omega Anima×2
- Vitality Hoof×1
- Windwyrm's Jewel×3
- Rupies×70,000
Awakening
Unlocked once the weapon hits Lv. 150. Done at Siero's Knickknack Shack, not the Blacksmith.
Awakening Lv. 1
- Exceptional Refinium×5
- Landbeast Horn×3
- Furycane Omega Anima×2
- Vitality Hoof×1
- Silver Centrum×1
- Legendary Merit×10
- Rupies×10,000
Awakening Lv. 2
- Exceptional Refinium×5
- Broken Savage Sword×3
- Gallanza Anamnesis×2
- Silver Wolf Clovis×1
- Silver Centrum×1
- Legendary Merit×10
- Rupies×105,000
Awakening Lv. 3
- Exceptional Refinium×5
- Chilling Demon Eye×3
- Managarmr Omega Anima×2
- Sequestered Mane×1
- Silver Centrum×1
- Legendary Merit×10
- Rupies×110,000
Awakening Lv. 4
- Exceptional Refinium×5
- Giant Beak×3
- Maglielle Anamnesis×2
- Cutthroat Flag×1
- Silver Centrum×2
- Legendary Merit×10
- Rupies×115,000
Awakening Lv. 5
- Exceptional Refinium×5
- Crowning Parapet×3
- Excavallion Omega Anima×2
- Fortified Hearth×1
- Silver Centrum×2
- Legendary Merit×10
- Rupies×120,000
Awakening Lv. 6
- Exceptional Refinium×5
- Flamebeast Horn×3
- Vulkan Bolla Omega Anima×2
- Silver Centrum×2
- Legendary Merit×10
- Dreaded Tail×1
- Rupies×125,000
Awakening Lv. 7
- Exceptional Refinium×5
- Ether Battery×3
- Id Anamnesis×2
- Destrudo×1
- Silver Centrum×3
- Legendary Merit×10
- Rupies×135,000
Awakening Lv. 8
- Exceptional Refinium×5
- Searing War Axe×3
- Angra Mainyu Omega Anima×2
- Calamitous Hand×1
- Silver Centrum×3
- Legendary Merit×10
- Rupies×135,000
Awakening Lv. 9
- Exceptional Refinium×5
- Frosty War Axe×3
- Calamitous Hand×1
- Calamity Corskscrew×3
- Silver Centrum×3
- Legendary Merit×10
- Rupies×140,000
Awakening Lv. 10
- Exceptional Refinium×5
- Frostbeast Horn×3
- Heliotrope Urn×3
- Demigod Feather×1
- Silver Centrum×5
- Legendary Merit×10
- Rupies×150,000
Materials and stats from Game8's Gateway-Star Sword page.
Sette di SpadeTranscend this on the way to Chaos++DefenderHP 2,575·ATK 2,003
Survivability. Handed over when the character joins the crew, and worth transcending later: a transcended Defender out-damages an un-transcended Terminus for most of Chaos.
- Max level
- 150
- Max HP
- 2,575
- Max ATK
- 2,003
- Crit Rate
- 0%
- Stun Power
- 0
Traits
- Stronghold
- Boosts defense the higher your remaining health is.
- Quick Cooldown
- Shortens skill cooldowns.
- Greater Aegis
- Greatly raises maximum health in proportion to your current maximum health.
Unlocked by transcending
- DMG Cap EcruTranscendence Lv. 1
- Boosts attack power and damage cap based on how high your maximum health is.
- Unbound ExertionTranscendence Lv. 7
- Boosts damage cap of Skybound Arts.
Everything it costs
13 upgrade steps in total, and 131,000 rupies. Quantities below are the full run, not per step.
- Fortitude Crystal【L】×170
- Ragnite (Defender)×76
- Silver Centrum×48
- Grand Refinium I×39
- Grand Refinium II×35
- Legendary Merit×35
- Daybreak Merit×27
- Fellowship Fang×8
- Fool's Fractured Jaw×7
- Dreaded Temper Tail×6
- Landbeast Claw×6
- Sequestered Flood Mane×6
- Vitality Lush Hoof×6
- Blood-Soaked Helm×5
- Exceptional Refinium×5
- Flamebeast Grimspike×5
- Frostbeast Grimspike×5
- Landbeast Grimspike×5
- Primordial Light×5
- Silver Wolf Trefoil×5
- Terror Urn×5
- Vile Demon Eye×5
- Dragon Scale×4
- Champion Merit×3
- Dragon Wing×3
- Excavallion Omega Anima×3
- Furycane Omega Anima×3
- Landbeast Plate×3
- Managarmr Omega Anima×3
- Primordial Earth×3
- Primordial Fire×3
- Primordial Water×3
- Primordial Wind×3
- Quality Refinium×3
- Sinister Prongs×3
- Supreme Merit×3
- Vulkan Bolla Omega Anima×3
- Fan-Fave Crown×2
- Landbeast Horn×2
- Standard Refinium×2
- Ancient Hollowpoint×1
Level upgrades
Six tiers at the Blacksmith, Lv. 10 to 150.
Tier 1Lv. 10 → 30
- Standard Refinium×1
- Rupies×1,000
Tier 2Lv. 30 → 50
- Standard Refinium×1
- Landbeast Claw×1
- Rupies×2,000
Tier 3Lv. 50 → 75
- Quality Refinium×1
- Landbeast Claw×2
- Rupies×7,000
Tier 4Lv. 75 → 100
- Champion Merit×3
- Quality Refinium×2
- Landbeast Claw×3
- Dragon Scale×1
- Rupies×15,000
Tier 5Lv. 100 → 125
- Supreme Merit×3
- Exceptional Refinium×2
- Landbeast Plate×3
- Dragon Scale×3
- Dragon Wing×1
- Ancient Hollowpoint×1
- Rupies×36,000
Tier 6Lv. 125 → 150
- Legendary Merit×5
- Exceptional Refinium×3
- Landbeast Horn×2
- Furycane Omega Anima×3
- Managarmr Omega Anima×3
- Excavallion Omega Anima×3
- Vulkan Bolla Omega Anima×3
- Dragon Wing×2
- Rupies×70,000
Transcendence
Endless Ragnarok only, and Awakening has to come first. Tier 1 and Tier 7 are the two that add a trait.
Tier 1
- Grand Refinium I×1
- Terror Urn×5
- Legendary Merit×10
Tier 2
- Grand Refinium I×3
- Fan-Fave Crown×2
- Vile Demon Eye×5
- Blood-Soaked Helm×5
- Ragnite (Defender)×3
- Legendary Merit×10
- Fortitude Crystal【L】×20
Tier 3
- Grand Refinium I×5
- Silver Wolf Trefoil×5
- Fellowship Fang×8
- Sinister Prongs×3
- Ragnite (Defender)×5
- Legendary Merit×10
- Fortitude Crystal【L】×20
Tier 4
- Grand Refinium I×10
- Landbeast Grimspike×5
- Frostbeast Grimspike×5
- Flamebeast Grimspike×5
- Ragnite (Defender)×12
- Silver Centrum×8
- Daybreak Merit×5
- Fortitude Crystal【L】×20
Tier 5
- Grand Refinium II×5
- Vitality Lush Hoof×6
- Sequestered Flood Mane×6
- Dreaded Temper Tail×6
- Ragnite (Defender)×16
- Silver Centrum×8
- Daybreak Merit×5
- Fortitude Crystal【L】×30
Tier 6
- Grand Refinium II×10
- Primordial Fire×3
- Primordial Water×3
- Primordial Earth×3
- Primordial Wind×3
- Ragnite (Defender)×20
- Silver Centrum×12
- Daybreak Merit×7
- Fortitude Crystal【L】×30
Tier 7
- Grand Refinium I×20
- Grand Refinium II×20
- Primordial Light×5
- Fool's Fractured Jaw×7
- Ragnite (Defender)×20
- Silver Centrum×20
- Daybreak Merit×10
- Fortitude Crystal【L】×50
Materials and stats from Game8's Sette di Spade page.
Spada di VentoStingerHP 2,568·ATK 2,497
Critical Hit Rate, for burst-damage builds.
- Max level
- 150
- Max HP
- 2,568
- Max ATK
- 2,497
- Crit Rate
- 0%
- Stun Power
- 0
Traits
- Critical Hit Rate
- Boosts critical hit rate.
Unlocked by transcending
- DMG Cap CobaltTranscendence Lv. 1
- Unbound TechniqueTranscendence Lv. 7
Everything it costs
13 upgrade steps in total, and 131,000 rupies. Quantities below are the full run, not per step.
- Fortitude Crystal【L】×170
- Ragnite (Stinger)×78
- Silver Centrum×65
- Grand Refinium II×35
- Daybreak Merit×27
- Legendary Merit×25
- Grand Refinium I×22
- Chilling Demon Eye×12
- Silver Wolf Clovis×11
- Frostbeast Horn×10
- Giant Beak×10
- Landbeast Horn×10
- Sequestered Mane×10
- Vitality Hoof×10
- Silver Wolf Trefoil×8
- Fool's Fractured Jaw×7
- Majestic Beak×7
- Vitality Lush Hoof×7
- Bizarre Wing×6
- Blue-Sky Spirit×5
- Exceptional Refinium×5
- Excoriation War Axe×5
- Frostbeast Grimspike×5
- Landbeast Grimspike×5
- Sinister Prongs×5
- Alpha Wolf's Valor×4
- Bizarre Ice Spine×3
- Champion Merit×3
- Dragon Wing×3
- Primordial Earth×3
- Primordial Fire×3
- Primordial Water×3
- Primordial Wind×3
- Quality Refinium×3
- Supreme Merit×3
- Gallanza Anamnesis×2
- Dragon Scale×1
- Standard Refinium×1
Level upgrades
Six tiers at the Blacksmith, Lv. 10 to 150.
Tier 1Lv. 10 → 30
- Rupies×1,000
Tier 2Lv. 30 → 50
- Standard Refinium×1
- Bizarre Wing×1
- Rupies×2,000
Tier 3Lv. 50 → 75
- Quality Refinium×1
- Bizarre Wing×2
- Rupies×7,000
Tier 4Lv. 75 → 100
- Champion Merit×3
- Quality Refinium×2
- Bizarre Wing×3
- Dragon Scale×1
- Rupies×15,000
Tier 5Lv. 100 → 125
- Supreme Merit×3
- Exceptional Refinium×2
- Bizarre Ice Spine×3
- Dragon Wing×1
- Alpha Wolf's Valor×1
- Rupies×36,000
Tier 6Lv. 125 → 150
- Legendary Merit×5
- Exceptional Refinium×3
- Chilling Demon Eye×2
- Silver Centrum×1
- Dragon Wing×2
- Alpha Wolf's Valor×3
- Gallanza Anamnesis×2
- Silver Wolf Clovis×1
- Rupies×70,000
Transcendence
Endless Ragnarok only, and Awakening has to come first. Tier 1 and Tier 7 are the two that add a trait.
Tier 1
- Grand Refinium I×3
- Ragnite (Stinger)×2
- Blue-Sky Spirit×5
Tier 2
- Grand Refinium I×3
- Majestic Beak×7
- Giant Beak×10
- Chilling Demon Eye×10
- Ragnite (Stinger)×3
- Legendary Merit×10
- Fortitude Crystal【L】×20
Tier 3
- Grand Refinium I×5
- Silver Wolf Trefoil×8
- Silver Wolf Clovis×10
- Sinister Prongs×5
- Ragnite (Stinger)×5
- Legendary Merit×10
- Fortitude Crystal【L】×20
Tier 4
- Grand Refinium I×10
- Landbeast Grimspike×5
- Landbeast Horn×10
- Frostbeast Horn×10
- Ragnite (Stinger)×12
- Silver Centrum×12
- Daybreak Merit×5
- Fortitude Crystal【L】×20
Tier 5
- Grand Refinium II×5
- Vitality Lush Hoof×7
- Vitality Hoof×10
- Sequestered Mane×10
- Ragnite (Stinger)×16
- Silver Centrum×12
- Daybreak Merit×5
- Fortitude Crystal【L】×30
Tier 6
- Grand Refinium II×10
- Primordial Fire×3
- Primordial Water×3
- Primordial Earth×3
- Primordial Wind×3
- Ragnite (Stinger)×20
- Silver Centrum×16
- Daybreak Merit×7
- Fortitude Crystal【L】×30
Tier 7
- Grand Refinium II×20
- Grand Refinium I×1
- Fool's Fractured Jaw×7
- Excoriation War Axe×5
- Frostbeast Grimspike×5
- Ragnite (Stinger)×20
- Silver Centrum×24
- Daybreak Merit×10
- Fortitude Crystal【L】×50
Materials and stats from Game8's Spada di Vento page.
Party
Recommended team — Captain (Gran/Djeeta), Eugen, and Cagliostro
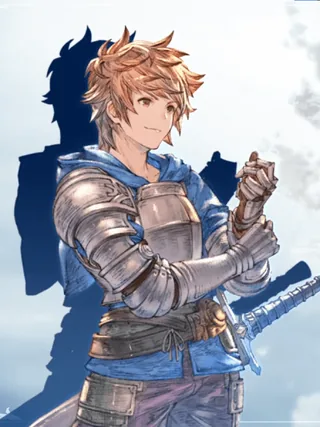 Captain (Gran/Djeeta)
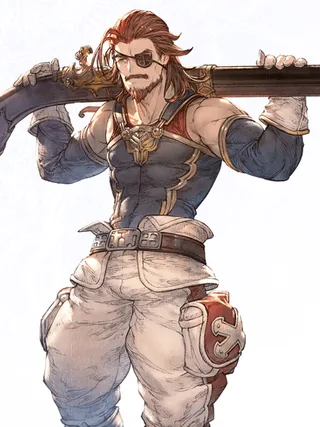 Eugen
Eugen Cagliostro
Captain will be your tank frontline, using The Substitute Master Trait build to provide shield for the party and absorb damage you take and redirect it to them. Phalanx and Substitute are important skills to bring. If you want Captain to deal damage, then picking Armor Break and Reginleiv is the choice. Otherwise, you can swap Armor Break with Rage , Veil , or Dispel depending on the boss you are tackling.
Eugen will be your ranged backline damage dealer using Flawless Vision Master Trait build to inflict a ton of damage with charged attacks and Detonator. His most important skills are Poison Grenade , Paralyzing Bullet , and Detonator .
Cagliostro will be your other ranged support using her Alchemedic Master Trait build to provide offensive buffs, healing, and shields for the party. Phantasmagoria and Reinforce are important skills to have. Pain Train and Alexandria are low-cooldown damaging skills that allow her to charge her Collapse quickly after use.
Go deeper
Video & written guides
 11:48
11:48Granblue Fantasy: Relink - Endless Ragnarok is HERE! Seofon & Tweyen Boss Guide
Globku · 3 weeks ago
 14:44
14:44*NEW MUST RUN SIGIL* THIS Seofon BUILD DESTROYS INFINITY (Granblue Fantasy: Relink Endless Ragnarok)
PlayerSage · 6 days ago
 6:11
6:11[Granblue Fantasy Relink - Endless Ragnarok] Seofon Ultimate Guide - Part 1 - The Basics
Pabloriv · 3 days ago
 13:03
13:03Granblue Relink - ENDLESS RAGNAROK STYLE GUIDE FOR SEOFON SWORD TEMPEST
LAMERBOI · 2 days ago